Roof care: inspections, common problems and when to call a roofer
Your roof is easy to forget until a stain appears on the ceiling. You can learn a lot about its condition from the yard, the attic and the gutters, all without setting foot on the shingles.
Many roof leaks don’t start as a hole you could spot from the street. They begin at seams: around a vent pipe, along a chimney, in the valley where two slopes meet. Water can run along a rafter before it shows up, so a ceiling stain may sit a few feet from where the water got in. By then, the roof may have been leaking for a while.
This guide shows you how to check your roof from safe spots, what common problems look like and how to decide when it’s time to bring in a roofer. Climbing onto a roof is dangerous work, so repairs and anything that requires walking the surface belong with a licensed, insured roofing contractor. Roofing license and permit rules vary by state and city.
01Step 1 of 7
Look it over from the ground
Twice a year, usually spring and fall, and after any big wind or hail storm, walk all the way around the house and study the roof. A pair of binoculars makes this far more useful. Look for shingles that are missing, cracked, curling at the edges or cupped in the middle. Watch for dark bald patches where the protective granules have worn off, and for any sag in the roofline or along the ridge. Check the metal flashing around chimneys, skylights and walls for gaps or rust. If an upstairs window looks out onto a lower roof, that’s a handy, safe viewpoint.
Take dated photos
Shoot the same angles each time from the same spots in the yard. Comparing photos side by side shows slow changes you’d never notice from memory.
Check the ridge and edges
The ridge and the lower edges catch a lot of wind. Lifted or missing pieces there are often the first sign a storm did some damage.
02Step 2 of 7
Check the attic after heavy rain
The attic shows you the underside of the roof, which is where many leaks give themselves away. Go up with a good flashlight during daylight or right after a long rain. Look along the roof boards for water stains, dark streaks and damp spots, especially around chimneys, vent pipes and valleys. Press on insulation near the eaves to feel for dampness. With the attic light off, look for pinpoints of daylight coming through. A musty smell or visible mold points to moisture that’s either leaking in from outside or rising from the house below.
Step only on framing
Walk on the joists or on solid boards laid across them. Stepping between joists can put your foot through the ceiling of the room below.
Look for winter frost
Frost on nail tips or the underside of the roof deck on a cold morning suggests warm, moist air is reaching the attic. Ventilation and air sealing may need attention.
Trace the bath fan ducts
Bathroom and kitchen fans should vent outside the house, not into the attic. A duct that dumps steam into the attic can mimic a roof leak.
03Step 3 of 7
Read the gutters for clues
Gutters collect evidence. When you or a gutter crew clean them, look for a buildup of granules that resemble coarse sand. Some shedding is normal on a new roof, but heavy amounts on an older roof can mean the shingles are wearing out. Check the fascia boards behind the gutters for soft spots, peeling paint or stains, which point to water overflowing or backing up. Downspouts should dump water far enough out that it can’t pool against the foundation. If your home is taller than one story, leave gutter cleaning to a pro, and use a steady ladder with a helper even on a single story.
Watch the downspout outlets
After a storm, look at the ground where downspouts empty. A spray of dark granules there tells the same story as a gutter full of them.
Note overflow during rain
Watching the gutters during a real downpour shows where water spills over. That spot may be clogged, sloped wrong or getting more water than it can handle.
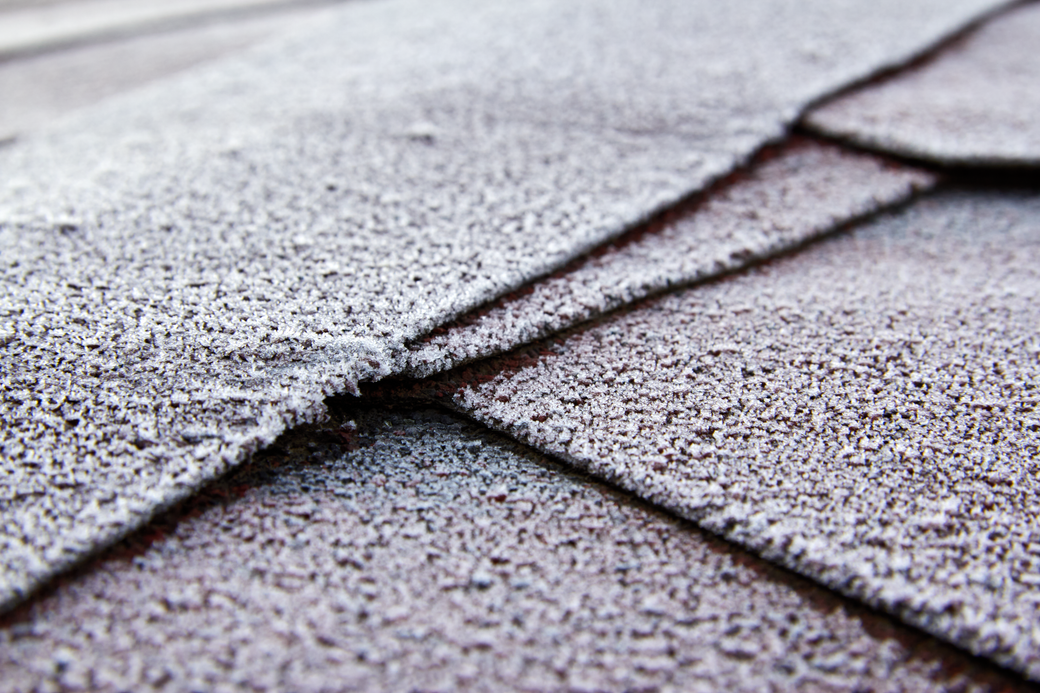
Close-up view of frost-covered roof shingles
04Step 4 of 7
Know the common problems
Certain problems come up again and again on roofs of every age. Flashing, the metal that seals joints around chimneys, walls and skylights, can pull loose or rust through. Rubber boots around plumbing vents crack in the sun and let water run down the pipe. Wind can lift shingles and break the seal that holds them flat, even when nothing looks missing. In cold climates, ice dams form when heat escapes into the attic, melts snow and lets it refreeze at the colder eaves. Moss and algae hold moisture against the surface.
Cracked vent boots
A split rubber collar around a vent pipe is a common source of small, stubborn leaks. It’s usually a modest repair for a roofer.
Lifted or creased shingles
A shingle with a crease across it has likely been bent back by wind. It may look fine from a distance but no longer lies flat.
Ice dams at the eaves
Thick ridges of ice at the roof edge can push water under shingles. Lasting fixes usually involve attic insulation and ventilation, not chipping ice away.
Moss and dark streaks
Dark streaks are often algae and mostly cosmetic, while moss holds water against the roof. Removal means roof work and products whose use rules vary by state, so hire a roofer.
05Step 5 of 7
Keep the roof clear and well ventilated
A roof tends to last longer when it can dry out and shed water freely. Have overhanging branches trimmed back so they don’t scrape shingles, drop debris into valleys or give squirrels a bridge onto the roof. Heavy limbs, and any branch close to a power line, call for a tree service. In the attic, make sure insulation isn’t stuffed against the soffit vents at the eaves, because those vents feed fresh air into the attic. Never pressure wash a shingle roof; it strips granules and can force water under the shingles.
Keep valleys clear
Leaves and pine needles that pile up in roof valleys hold water and slow drainage. A roofer can clear them safely during a routine visit.
Retire old dish mounts
Old satellite dish mounts, antennas and cable brackets screwed into the roof can leak around the fasteners. Ask a roofer to remove or reseal them properly.
06Step 6 of 7
After a storm, document and slow down
Once a storm passes, check from the ground and the attic, not from a ladder. Stay far from downed power lines and call the utility about them. Photograph any damage, fallen limbs and debris, along with interior stains, and note the date. If water is coming in, a roofer can put down a temporary tarp. Call your insurance company to learn how its claim process works before you sign anything. In the days after a big storm, contractors you’ve never heard of may knock on doors. A reputable roofer expects you to check credentials and compare estimates, and gives you the time to do both.
Don’t sign at the door
Take the business card, not the contract. Look up the company, read reviews from sources you trust and call back if you want an estimate.
Verify license and insurance
Licensing requirements for roofers vary by state and city. Ask for the license number, check it with the issuing agency and request proof of liability insurance.
Be wary of big deposits
Ask how payments are scheduled and read the terms before paying anything up front. Some states set specific rules for storm repair contracts, so check yours.
07Step 7 of 7
Decide between repair and replacement
A few missing shingles or one cracked vent boot usually calls for a repair. Widespread curling, heavy granule loss across several slopes, soft spots in the roof deck or leaks in multiple places may point toward replacement. Age matters, but condition matters more. Get written estimates from licensed, insured roofers and compare what each includes: removal of old material, underlayment, new flashing, ventilation, cleanup and warranty terms. Local codes may limit how many layers of shingles a roof can carry, so ask whether tear-off is required and who pulls the permit.
Compare scope, not totals
Two estimates with different totals may describe very different jobs. Line up the details side by side before you decide which one makes sense.
Get warranty terms in writing
Ask what the manufacturer covers, what the roofer’s workmanship warranty covers and for how long. Keep copies with your home records.
Before you call a roofer
0 of 7
Tick items off as you go. Nothing is saved or sent anywhere.
Common questions
It varies with the material, the quality of installation, attic ventilation and your climate. Asphalt shingles, metal, tile and slate all age differently, and a roof under harsh sun or heavy snow wears on its own schedule. Rather than counting years alone, watch its condition and ask a roofer to assess it if you see widespread wear.
It’s safer not to. Roofs are slippery, pitched and high enough to cause serious injuries, and walking on shingles can damage them. Do your checks from the ground with binoculars, from a window that looks onto the roof, or from the attic. Leave anything that requires being on the roof to a licensed, insured roofer.
Set a bucket under the drip and move furniture and valuables out of the way. Stay clear of any wet light fixtures, outlets or switches, and call an electrician if water is near wiring. Photograph the damage, then call a roofer and your insurance company to ask how their process works.
Often, but it depends on where you live. Many cities and counties require a permit for a reroof, and some limit how many layers of shingles can stay on the roof. Ask your roofer who pulls the permit and check with your local building department, since roofing rules differ from one state and city to another.
Roofs tend to give some warning before they fail, and the signs usually show up in the gutters, the attic and the view from the yard. Look twice a year and after big storms, and keep your photos and notes together so a roofer can see the history. HomeIsSecure puts out homeowner guides to help you understand what you're seeing, but a guide can't stand in for a roofer's on-site assessment. When something looks off, call a licensed, insured roofer and leave the ladder in the garage.
Gutters are only half the job. Learn how roof water should travel away from your house, how to clean safely, and simple downspout and grading fixes that help protect your foundation.
Most pests walk in through small gaps homeowners overlook. Here is where to look, from the foundation to the roofline, how to seal common openings, and when to call a licensed pro.
Lawn care depends on your grass type and climate. This season-by-season guide covers mowing, watering, feeding and fall work, plus the local rules and questions to ask before hiring help.
Read the article
Fill your schedule with homes that need you.
Property and homeowner records, service-area maps, routes and outreach tools for HVAC, roofing, plumbing, pest, lawn and handyman crews.